Kid crafts

Making Your Own Way

Nearly six years ago I got a surprise email from a woman I'd met only once before. She was the sister-in-law of a dear friend of mine, a fellow University of Idaho alumni, and a local interior designer in Boise. She wanted to meet for coffee and talk about a proposition. I'd recently been laid off from my job as a curator at the only art museum in Idaho. I was blazing my own trail and cobbling together the career that I really wanted, including being my own boss in the local art scene, a writer, and a burgeoning body positive activist. I'm always open to meeting new people and taking unexpected paths, though, and thought, why not?


I pride myself on having an intuitive read on people and a savvy sense, so after a long conversation over brunch at a little bistro at a garden nursery in Boise's North End, I knew I'd met my entrepreneurial match. Kristin had an idea - she'd seen a lack in the art and craft scene, particularly around quality holiday bazaars. I couldn't agree more, I said. Boise needs something a little edgy and indie and high quality. I think we should start one, but I need you. I've got the business experience and organizational expertise, but I need your curatorial eye and connections in the art world, she said.


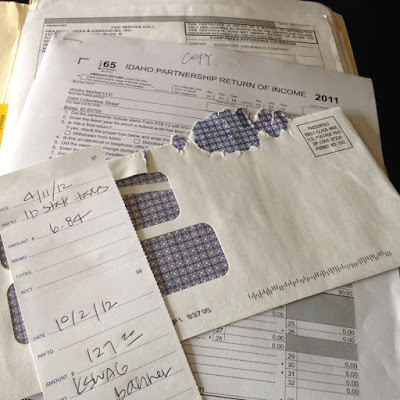
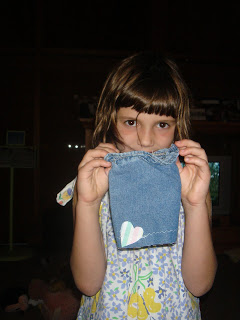
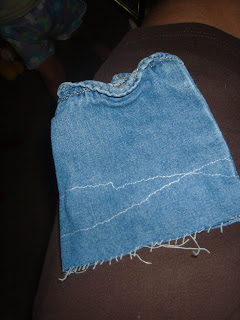
A lot of research, organization, hard work, long hours, and creative sessions later, Wintry Market | Handmade for the Holidays was born. And here we are, celebrating our fifth birthday this weekend. Since the beginning, we have prided ourselves on hand-selecting our vendors for the best quality and diversity in one marketplace, while charging a modest booth fee and taking no artist commission. Kristin and I spend hours doing tax paperwork and making Excel spreadsheets and working with a local artist to design our poster each year. We write blog posts and Facebook updates and promote on the radio and craft press releases. Our assistant, Anna, is the creative genius behind our amazing website, where she volunteers her time. You'll see our husbands there up on ladders and our parents babysitting grandchildren and hanging signs and my 11-year-old daughter Lucy selling art at my booth, including embroideries she stitched with her own little hands. The behind-the-scenes work that goes into this successful local event is extraordinary and so worth it, as all the best small business endeavors are. Over 1,500 flock to our free event each November on the weekend before Thanksgiving and shop. They meet the artists in their neighborhoods and buy earrings for themselves and hand-crafted candles for their grandmas. Their kids hang out at our free art stations and snap photos at our photo booths and eat lunch at local food trucks in the parking lot.


Our very first Wintry Market was at Ballet Idaho with around 30 vendors one snowy weekend five years ago and we've grown to take over the entire historic El Korah Shrine with 63 vendors, both upstairs and down, and a full bar for your cocktailing pleasures. This year we're excited to partner with the Boise Public Library to bring you a free 3-D printing workshop where you can make your own tiny jewelry treasure. The annual Boise Holiday Parade will be happening in the neighborhood on Saturday morning as well, so bring the little ones, wave to Santa, and stop by to meet the makers afterward, including Kristin and myself. She'll be upstairs near the stage at Inspire Me Gifts with darling stockings she's been slaving away at over her sewing machine and I'll be downstairs at Ticky-Tacky, selling subversive cross-stitches and thrift store monster paintings. You may not find us at our booths much, though, as we'll be running around like happy little elves, stocking toilet paper in the bathrooms, helping with parking, chatting with vendors, (hopefully) sipping a cocktail in the Oasis Bar and spreading the truth and love about making your own way in the Idaho grassroots art scene.  Because not only do we at Team Wintry believe that to be true, we've proven it to be a successful business model and a way to give back to our art community, making it the best kind of business to be in.

 {I take unloved and discarded landscape and still-life paintings from thrift stores and rummage sales and illustrate and paint quirky monsters in them giving them a silly new life. $20-$40 at my Ticky-Tacky booth at this weekend's Wintry Market!}
 
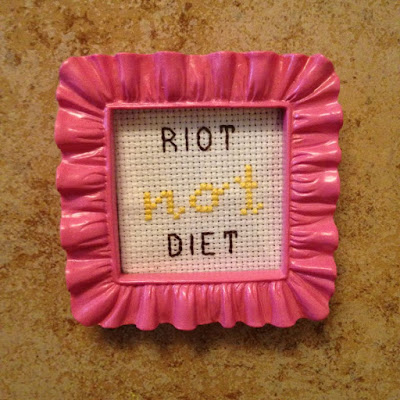
{As a radical feminist artist, I often incorporate needlepoint, particularly cross stitch, in subversive ways. These stitched up bits of craftivism are all unique and available at my Ticky-Tacky booth at this weekend's Wintry Market, $15 each.}


THRIFTY: Homemade Bath Goodies

Every year for the holidays, the girls and I love making homemade and handmade gifts for our friends and neighbors. Often it's baked goods, like my family-famous pumpkin bread, candy or cookies. Some years, though, we get a bit more ambitious and want to make something new and offbeat, not your traditional Christmas goodies. This past year was one.
 
 
As always, I love to use inexpensive ingredients and reuse and repurpose items. This fall we had harvested our lavender plants, dried the flowers, and put them in the freezer to preserve. I had also saved this bath sachet recipe on a Pinterest board several years ago and knew these would be perfect.


I had a box of powdered milk in my pantry, as well as oatmeal, rubber bands and twine. I ran to my neighborhood Dollar Tree and grabbed a few boxes of baby washcloths, which were 4 for $1. You could, however, just use any scrap of fabric you have, cheesecloth or muslin.


I think the images do justice in place of written explanation on how to make these (read: SO EASY). I typed up these little directions, printed them off, cut them and attached the to the sachets.

OATMEAL LAVENDAR MILK BATH SACHET | Tie the twine to hang the bundle under the faucet as hot water fills the tub. Squeeze the sachet to release the herbal properties into the water, or swirl the sachet around in the tub. The tub is now your giant cup of herbal tea! Once the bath is over, shake the wet herbs into a flowerbed, compost, or other container for disposal. The washcloth is yours to be used again!


In addition to the bath sachets, Alice and I whipped up some brown sugar coffee scrub. Every day after drinking my pot of java, I dump the grinds onto a large tray in the garage to dry. Once dried (this may take a few weeks because you really want them to be very dry), you mix the coffee grinds, brown sugar, olive oil, a tiny bit of vanilla extract, and a few shakes of cinnamon. I used a version of this recipe, but quadrupled it to make a lot more. Having a plethora of baby food jars from Arlo, I spray painted the lids a festive red, filled them with this yummy scrub, and tied on a cute paper tag. This scrub is ideal for dry hands and feet and works really well. It makes a huge mess of coffee grinds if used in the tub, though, just FYI. For this project, I had all the ingredients on hand, and repurposed the jars and paper tags, so it cost me next to nothing. Both projects turned out great, were fun to make in the kitchen, and so easy for the girls to help with. They'd be perfect for Valentine's Day or Mother's Day, too!

ARTSY: Dia de los Muertos Skulls

I'm a huge fan of the Dollar Tree just a few blocks from my house in Vista Village shopping center here in Boise, especially around the holidays. Their décor is killer, and so much fun to be creative with without costing much at all.


 Last year I saw (too late) these large felt skulls, probably 18" tall by 12" wide in both white and black for a dollar a piece. By the time I thought about crafting them up to make darling Dia de los Muertos skulls and went back to the store, they were all snatched up.


This year I bought three, one each for Lucy, Alice and I to try our hand at. While I originally thought I'd get out my embroidery thread and needles for some cute stitching, I quickly changed my mind because, um, crafting with kids is sometimes hard enough without making it harder (am I right or am I right?). A faster, easier method of getting the same colorful details as thread? Brightly colored Sharpies.


Pull up some sugar skull and face painting images of Day of the Dead from the Internets for inspiration. Add in a few tubes of glitter glue, sequins and leftover Mardi Gras mask making feathers. Voila! Cutest decorations to grace our front window during any Halloween season we've had. (Pro Tip: the plastic hanging hook that the price tag was attached to? Don't rip it off. Use it to hang your skulls on a tiny suction cup hook on your window!) I even ran back to the Dollar Tree to snatch up three of the black skulls to craft up next year before they ran out. Again.

KIDDOS: Boise Bench Junior Master Gardeners

As School Garden Coordinator for my daughters' little elementary school on the Boise Bench near our home, I have spent the last two years learning about, building, and growing our school's first veggie garden and native plants garden. I wrote (and received!) a $2000 grant from the Whole Kids Foundation and received a training grant from the Boise Urban Garden School (BUGS) as well. Bringing growing and earth-friendly practices to children has become somewhat of a new passion of mine and has been so much fun to implement.
 

Part of this adventure included learning about the Junior Master Gardener certificate program. It's just like the adult version, but a bit more playful and can be taught as a community club or a 4-H program. Also, the leader can be an invested parent like myself, and isn't required to have Master Gardener certification. All I had to do was purchase the teacher's manual and some textbooks for our kiddos and find some interested children around ages 8-12 and we were set. My friend Kelly offered to be my co-leader, which has been a great help having baby Arlo around, and we quickly got 6 kiddos who were interested. (We could've opened it up to so many more who have expressed interest, but we just can't manage that many with the two of us.)


The curriculum is so much fun and we began meeting for an hour and a half every Thursday during the summer at Borah Park in Boise, where we also rented a community garden plot for our little gardeners. We've organized field trips, like the one pictured above to the Boise WaterShed Educational Center for a wastewater treatment plant tour, and even made some "crop art" out of seeds and recycled wood to enter in the Western Idaho State Fair (we won a third place ribbon!).


The kids have had a blast planting flower seeds, weeding, capturing bugs, journaling in the garden, and doing art projects like pressing flowers and leaves and making them into cards, as pictured above. (Really, the little girl above was having fun, I promise.)


We have invited guest speakers, like Jan the Worm Lady, from Capital City Public Market, to come and teach us all about worms, their importance in our gardens, and help the kids build a worm compost system.


Our crew continues learning and finishing up the projects and lessons in our book until February, when they will all graduate with their Junior Master Gardener certification. Next week we are having an apple harvest party here at my house, picking, peeling, coring and baking an apple dessert from our little urban mini orchard. After that, we are creating a scarecrow for the Idaho Botanical Garden's fall festival Scarecrow Stroll. Soon we'll be wedding and cleaning out our garden and will start meeting in our homes after school each week, but you can bet will still be digging around in dirt, brought inside in buckets.

KIDDOS: Homemade Playdough


Since Christmas, Alice has been really into playdough. She found our shoebox filled with all kinds of bits of old playdough, mostly mixed to a gray, dry lump. They worked for her, though, and she rolled and stacked and kneaded the stuff for hours. Finally, in our winter hibernation some inspiration hit and I decided to make our own. Honestly, I can't believe I've never made homemade playdough before. It's so easy, fun and inexpensive to create at home.

I found this recipe for the World's Best Play Dough via dig this chick and was smitten. It takes just a few ingredients from your pantry and cooks quickly on the stovetop. The only thing I changed in the recipe is adding just one or two drops of food coloring instead of 2 teaspoons as the recipe calls for.
We made all the colors in our food coloring box: red, yellow, green and blue. The dough is so soft and pliable and lasts much longer than the pre-packaged stuff. We store ours in old mason jars, but ziploc baggies or plastic containers would do as well.

We shared our new found fun with the other toddlers in our playgroup. While the mamas sat around drinking coffee and noshing, the kiddos sat happily at the kitchen table creating away. The best part about playdough is that everyday kitchen tools work great for sculpting - ice cream scoops, forks, plastic knives, cookie cutters, and rolling pins. My favorite new kitchen tool for playdough, however, is the garlic press; it makes super cool noodles or hair for your little sculpted creatures. The best part is that this has kept my insatiable preschooler occupied for hours and, while I might spend lots of time sweeping up dried bits of the playdough from the floor, its a great creative outlet.

CRAFTY: Making Old Stuff New Again

It's finally fall in Idaho, as it seems the 90 degree days are now gone for good. It was a little disconcerting, even as a sun worshipper, to be spreading our cotton spider webs around the rose bush and putting out our 'TRICK OR TREAT' doormat in shorts and tanks. And I couldn't be more happy to welcome the 60 degree overcast mornings, pull our sweaters out of storage, and cuddle up in my Snuggie with morning coffee. It's time.

Along with the change in seasons and weather comes the inside time after a long summer spent under the blue skies. I like that shift indoors, even though with it comes bigger messes and the occasional bouts of cabin fever. Luckily, we've got things we love to keep us busy this time of year - our overflowing bookshelves and my trusty Singer sewing machine. As always, I'm really big on recycling old things into new and love the challenge an overlooked object presents. Over the past few months I've discovered a really great way to use the girls tattered, torn, or stained clothes and make them into something new and usable.


I've been cutting out patterns or appliques from undamaged parts of their old t-shirts and making them into 'patches' to cover up small stains or tears on perfectly good wear. You can see here I covered the bum in a pair of Alice's blue shorts with a pink ballerina and cut some hearts from another tee for her little turtleneck. I've been using whatever fun color of thread is currently in my machine to add to the funkability factor of these patchwork items and I love the way cotton jersey rolls a little when you stitch it on.

Another great idea (which I stole from this blog) was to cut off the girls' pants into shorts when they still fit everywhere but the length. We did this all summer with jeans and 'jama pants and it's a great way to prolong the life of clothes, especially with wee ones that grow so fast. (We did the same with Alice's onesies, making them into little t-shirts.) I discovered that Alice's tiny pant legs, when cut off and turned upside down, looked like the perfect doll skirts, with the elastic waists already in place.


So one night Lucy cut out patches and picked cute stitches on my machine and we whipped up four skirts in no time flat! We could've cut some shorter for baby dolls like this one (or even added straps!) but thought it looked cute as a strapless dress, even though it's a wee bit inappropriate for a baby her age.

We also could've easily hemmed the skirts, but thought the ragged denim look was hip. It would be fun to pick up some infant pants at thrift shops and add other iron on patches and the like for little girls' birthday or Christmas gifts as well.

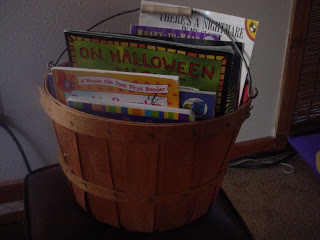
My friend Kristyn gave me this cute idea the other day for the month of October: gather all your Halloween books into a basket for a special seasonal reading nook. This is especially great for those parents, like me, who are a little too unorganized to put away holiday books and only pull them out once a year.

Alice and I had fun rummaging through our numerous bookshelves in search of books, and came up with more than I even knew we had. We took liberties with the theme and included books on fall, monsters, and spiders, too, and put them all in one of our apple buckets. We are avid readers here and my kids (like yours, I'm sure) get hooked on one book and want us to read it TEN THOUSAND TIMES IN A ROW. So this is a fun way to rethink about books you already own and celebrate the season. I love this idea so much that I'm continuing it into the winter. So, what about you? Any hobbies you reintroduce in the fall? What are your favorite ways to make old stuff new again to your kids?

CRAFTY: Shoebox dollhouses

A few weeks ago I hosted a recycled craft party for our weekly playgroup. I collect lots of junk and it's always fun to brainstorm ideas on how to use our garbage to create something new and fun. The web has lots of ideas and photos inspiring the creation of shoebox dollhouses for creative play. To make the home designing a bit easier on our young crowd, I precut the cardboard "floors" and glued them in. I had a variety of box sizes to work with, which makes it more fun and some smaller "homes" worked better for My Little Petshops and Polly Pockets. This, of course, appealled to the kiddos.

I outfitted our patio with bins of stickers, glue sticks, scissors and a variety of magazines and store mailers to cut out furniture, decor, bedding, pets, and toilets.
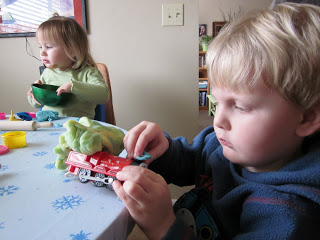
The kids loved wallpapering with my leftover scraps of Contact paper and had fun flipping through the magazines finding images to fit their floorplan. Some particularly inspired designers stapled boxes together to create garages filled with recreational vehicles and cars.

They turned out super cute and the kids had a great time making them. The project cost nothing and the kids loved incorporating their handmade houses with their well-loved toys. So easy and a great way to use your recycled items for some summer fun.


KIDDOS: Making Pine Cone Feeders


There have been several days this spring when we've all been laid up sick. One of those days not long ago we never got out of our pajamas and spent the day lounging around, but after too many reruns of Maya & Miguel and Dinosaur Train we were all about to go crazy. So I decided to teach the girls how to make pine cone bird feeders for our backyard. This little nature craft is simple and most everyone will have all necessary tools on hand. First, I sent the girls to the backyard to find some pine cones. Next, we tied a long piece of string around the middle of each one.

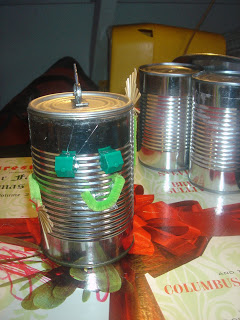
We then scavenged our kitchen and shed for items the birds would like to eat: birdseed, nuts and Cheerios. After smearing the cones with peanut butter, the girls rolled them in the concoction.
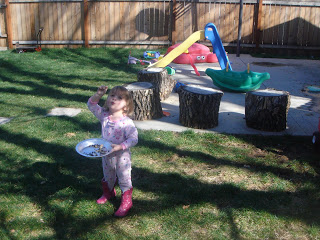
We made a couple of them and took them out to the backyard. I tied them up in the trees while the girls directed me to the 'correct' branches.
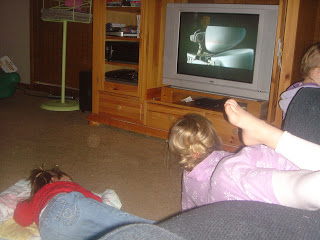
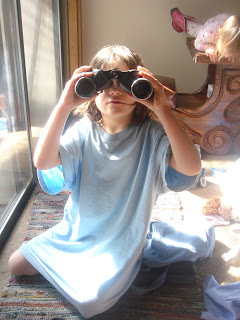
Afterwards, we got out the binoculars and watched from the warmth of our family room through the sliding glass doors. While we were hoping for lovely little birdies, we got the aggressive urban squirrels instead, who ate the whole thing in no time. They even ripped the pine cone from the string and took that with them. Still, it was a fun way to kill an hour when you're stuck in the house and get a little nature time in. We'll have to make some more this summer when the urban wildlife is out in full force and we can just sit under the tree drinking lemonade to keep watch.

KIDDOS: A Ratatouille Birthday Fete

Both Lucy and Alice were born in April, not by choice, but simply based on the fact that I must be extra fertile in July. Since their birthdays are just two weeks apart, they will be forced to have a joint birthday party as long as they let me. This year we decided on a Ratatouille birthday party theme, based on the darling animated kids film of the same name. We own the movie and it quickly became one of our favorites; as a foodie and someone who longs to visit Paris one day, I am especially fond of this cute film. So, I started browsing the Internet for party ideas, certain that other parents had had the same idea, but was surprised to find little inspiration there. I did find some fun suggestions from other parents who had designed cooking themed parties, though. Mostly, I ran with the idea and used my own creative means to come up with what turned out to be a super cute French bistro party.


My sweet inlaws decided to get a few spring pots of flowers planted for my porch and I made the cute recycled plastic flower wreath for our front door (it's a little hard to see from this photo, but I'm planning another post on this soon). I cut the Bonjour letters freehand from glittery printer paper I had around the house and strung them on ribbon as a little French greeting for our guests.


The food and drinks were set up in the kitchen, and I already own a couple of red and white checked table cloths that seems appropriate for a French bistro. I used an old chalkboard to write le menu on, which included things like fromage, limonade, biere, and baguettes. I knew I kept my old English/French dictionary from high school for something! We already have a stash of white paper plates, napkins and silverware, so I didn't have to purchase those either. It was fun to pull out all our fancy crystal and white party dishes to use for the food, including a great crystal punchbowl that we recently scored for free.

I served fresh fruit, veggies, several types of cheeses, breads, crackers, beer, wine, and lemonade. It was an afternoon party, so light snacks were fine, as most people had already eaten lunch. The special treat, though, was the homemade ratatouille that Eric whipped up for the party. He used this recipe from The Joy of Cooking, and for those of you who haven't had it, it is basically a fresh vegetable stew that is too die for. I purchased the 3-D Eiffel Tower puzzle you can see in the background as a table topper at Pier 1, and it was fun for us to put together with Lucy the week before the party. Also in the background you can see some black rat silhouettes on the walls. They are something we already owned - Halloween decorations by Martha Stewart Crafts - but fit perfectly with this party theme!

I made the cake to look like a slice of Swiss cheese and found some plastic rats at our local party supply store, Zurchers, to place on top. I always try to make the cake myself (it's way cheaper and more fun) and almost always use boxed mixes for it, as they are easy, moist and yummy. I made the frosting myself with a super easy recipe from my new go-to cookbook, The Joy of Cooking.

We were lucky enough to have a sunny 70 degree day, so had the party festivities in the backyard. Once all the girls arrived, they decorated pink and blue aprons with Sharpie markers, stamps and stencils. We found these cute kids fabric aprons at Joanns Fabric for $1 a piece. I made these darling chef hats from this tutorial from Family Fun magazine out of white tissue paper and posterboard. They were super easy and fun and cost only about 60 cents total for the 2 sheets of posterboard, as I already had tons of white tissue paper. I used black eyeliner to draw whiskers and rat noses on all the girls, too, which completed their party ensemble.

I made a 'Pin le Tail on le Rat' game out of an old piece of cardboard and paint and Eric nailed it to the fence. We blindfolded the older girls but let the babies stick their tails on without.

Between games the girls played in our sandbox and with our various backyard toys. Next up was the pinata, which you can see hanging from our basketball hoop. This was my first attempt at making a pinata, and let me tell you, I fought with that paper mache like mad. It only cost my 50cents to make, and that was for the balloon I bought from the dollar store to use as my form. I hung it from my patio and used the traditional method of mixing flour and water and dipping torn pages from an old phone book to create each layer. On an especially warm day, my balloon expanded, causing my pinata to bust in half and later the whole bottom sunk in (AAHH!), but I managed to salvage it. The final layer of paper mache was pink tissue paper and Lucy decided it looked like a strawberry. It helped once I painted on the black 'seeds' and stuffed green tissue paper in the top as a stem. It did turn out cute and was pretty easy, once I learned a few tricks. I highly recommend giving it a try, and there are numerous how-to sites on the Web to help you out. It's WAY cheaper than purchasing one of those pre-made pinatas and a lot more personal. We filled ours with all sorts of dollar store goodies, including candy, bubbles, jewelry, whistles, and plastic coins. These treats, along with the aprons and chef hats, acted as the party favors.

Here are the girls getting ready for a relay game where I filled one large mixing bowl/pot with water and set an empty one some distance away. I divided the girls into two teams and gave them each a ladle or measuring cup. They had to take turns taking water from the bowl and filling up the other, and the first team to empty the bowl won. The babies kind of caused mass chaos, as they, too, wanted to play, dump water on the ground, and run between teams. This, luckily, caused hilarity and the big girls didn't seem to mind the lapse in order.


I set up our patio to resemble a little French bistro for the girls. I covered our kids' tables with white 'linen' tablecloths that I made from cutting up a white bedsheet I got at a garage sale. I placed our numerous crystal candleholders and vases of roses around and put up a lovely poster of the Eiffel Tower. You can't really see them in this photo, but I spray painted an old sign (now announcing Le Ratatouille bistro) and an old chandelier gold and hung them as well. My mom bought the girls the Ratatouille movie soundtrack and we played this outdoors, adding to the French bistro air. The kids sat out here to eat their snacks, cake and ice cream.

It was a cute, easy party to put together and only cost me around $100, which was spent on food (which we got at Winco the morning of) and drinks (which also came from Winco, with the exception of the growlers of beer from our local brewery, Tablerock), and is a great deal for a party for 25-30 people. I made most of the decorations myself from things I already had around the house or picked them up super cheap at thrift stores. It was really fun being creative with what we already had and it turned out to be a lovely, low-key party perfect for ma petite chouchou.

FOODIE: Handmade Valentine Goodies

My dear friend Kristyn invited the girls and I to join in on her tradition of making homemade chocolate candies for Valentines Day treats. I was thrilled, as I don't have a lot of experience with making candy and was excited about the possibilities. She bought the ingredients and provided the expertise and the kitchen, and I brought my girls and some crafty supplies for making cute recycled containers for the candies to go in.

Being a southern belle herself, Kristyn has grown up eating and making Food Network chef Paula Deen's goodies. On the menu were Deen's Almond Chocolate Balls, her peanut butter Buckeye Balls, and some mini red velvet cupcakes (these were from the box because, seriously, we're amateur chefs and mothers, not crazy).


Unfortunately, I didn't get any pics of the candy creating process, as it was a bit chaotic in Kristyn's kitchen with two demanding babies under our feet and two kindergartners asking for more glitter and sprinkles. Also, candy making is a bit of a time consuming process, especially melting the chocolate in a double boiler and dipping each one quickly. Anyhow, when you click on the above links for the recipes and tutorials, you'll notice immediately that my Buckeyes look not near as nice and polished as hers. Clearly, my Almond Chocolate Balls above, which basically taste just like Almond Joy bars, are not ball-y at all. Have you been reading this blog a while? I'm CLEARLY not a perfectionist.

I was surprised how easy the candies were to make, and how few ingredients they required. Additionally, we came up with some really darling containers, handmade by our children, to box up the candies in. The silver painted container is a baby formula can with the label stripped off (the lid is also cute with pink paint and tons of glitter, but is currently lost somewhere in my girls' playroom). The red containers formerly held sliced deli meat and are decorated with felt, glitter and stickers. A cream cheese container is covered with Contac paper, gingham fabric hearts and glitter (in the foreground).

We lined all the containers with valentine themed cupcake papers and stacked the candies inside. Here you can see we used individual apple sauce containers covered with plastic wrap and ties with pretty satin bows. These sweet little packages were valentines for Lucy's three teachers.
Valentines Day can be a sweet holiday when filled with heart-felt lovely surprises. All our candies are accompanied by hand-colored cards that Lucy made for our family members. I have to say, it is way less stressful to make homemade candy on a holiday other than Christmas. It's made these gifts much more special to make, give, and receive thus far. And my two little cupids have a few more deliveries to go.

KIDDOS: Robot-o-Mania

One of our fun weekly playdates for our Sun and Fun Playgroup last month was a robot-themed party at my house. I stole the idea to make robots from this blog and started collecting materials, both from the garbage and the tool shed.

I set up the supply station in my garage. We used a variety of cans, from old pie tins, pots, baby formula cans, and soup cans for the bodies. The accessory parts were displayed in an old game box tray as well as my muffin tins and included things like buttons, bolts, Monopoly game pieces, bottle caps, plastic bread clips, bobby pins, paper clips, wire, magnets, and beads. There were also Sharpie markers, pipe cleaners and stickers.

The kids had a blast picking out their bodies and crafting their versions of robots, aliens, and UFOs.
The parents had a station set up with hot glue guns and applied the items as directed by the kids. We had so many supplies and such fun creating, that the kids each made 2 or 3 robots a piece. In fact, I made 2 or 3 myself. And Eric made one that night when he got home from work. We now have a whole heard of recycled sci-fi characters lining our fireplace mantel.

While the kids created, the parents ate and ate and ate and talked the afternoon away. After the robot making, we made popcorn and watched the movie WALL-E, which happens to be one of my favorite kid films of late. It was a really fun, creative afternoon and a great way to get kids experimenting with found materials in an unusual way. The whole event cost nothing to put together but a little time and imagination and turned out to be one of our most memorable January days.

CRAFTY: Spooky Squash Ghosts

I've made these cute little ghosts for the past couple of years for our Halloween party and they are cute, easy, and cheap quick decorations. We picked up a couple of butternut squash from the pumpkin patch for 45cents each, and a few came from grandma's garden. First, you thoroughly spray paint them white in the backyard or other well ventilated area:

After they've dried, use a black Sharpie marker to draw or cut black felt to glue the eyes and mouths onto the squash to make ghosts:

The one on the far left is Alice's, so it's a bit more abstract. I think they are darling and they last longer than a carved pumpkin. Lucy and her little friend loved drawing scary faces and they make great party favors for guests to take home rather than a bag of cheap plastic and candy goodies. We love decorating for Halloween and the amount of stuff we have for this holiday rivals the amount we have for Christmas. We also made this little recycled craft my friend Shannon over at AnchorMommy.com came up with and they are so simple and fun for kids, too. Both of these crafts, the squash ghosts and the jar jack-o-lanterns, would be nifty activities to do AT your kids' Halloween party. And, as always, the best thing is that they are very inexpensive, easy, and eco-friendly!