Thrifty

Weighing In

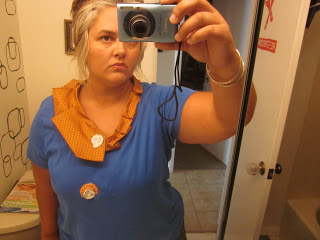
I've been active in the body positive movement for nearly seven years now. In early 2009 I Googled the words, "why am I fat and happy with it?" and after scrolling through pages and pages of diet industry links and how to be happier by losing weight, I finally stumbled across two blogs that forever changed the way I look at my body and the world. I will always be indebted to The Curvy Fashionista and the Fat Heffalump for leading me down a fat acceptance path of revolutionary feminist thought that has helped create the person I am today. I devoured book after book and blog after blog and researched like mad for the following three years, working internally on my voice and self-love, getting stronger day by day. It was showing up in my art and writing and, by early 2012, I was ready to take it public in a big way.

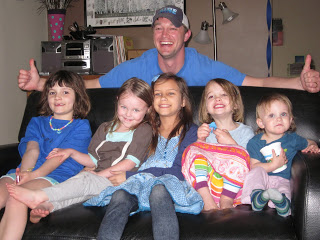
I applied for Ignite Boise, an innovative public presentation event where a few lucky speakers stand up and have 5 minutes and 20 Powerpoint slides to share an idea with the 800 Boiseans who pack the house at the historic Egyptian Theater that night and, later, the world via YouTube video. I offered up a program titled "Accepting the Big Ass: How to Be Fat, Fit and Flabulous," proposing a brilliant and subversive spin-off of a 2011 blog post by Dianne Sylvan called 10 Rules for Fat Girls. Ignite Boise said yes, and I was scared shitless as I stood shaking on stage and told the entire audience that I was fat and that I weighed 250 pounds. It was liberating and terrifying and I'm still pretty damn proud of that performance.

 
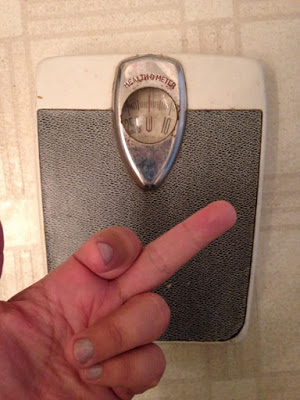
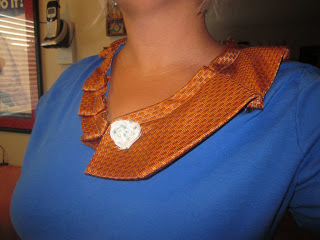
A few weeks later I wanted to do something guerrilla art related to celebrate International No Diet Day on May 6th. I had long been a follower of fat activist Marilyn Wann, who had created some body positive art called a YAY! scale, a traditional bathroom scale turned craftivism that gives you affirmations rather than numbers when you step on it each morning. I thought it was such a fantastic idea that I took my old scale and disassembled it, making my own radical piece.

I decided to sneak it in to Modern Art, a yearly event put on inside a mid-century boutique hotel, in which rooms are rented out to local artists to use as an impromptu gallery for the night. There's live music, drinking, dancing and performance art and it's a super popular Boise event that draws thousands of people to the small downtown hotel.

I placed my version of the YAY! scale along with a sign right near the women's restroom off the lobby. I tucked it into a corner, perfect for people waiting in line to use the only bathroom in the place. The spot was too tiny for covert photographing, but I secretly watched people read the sign and stand on the scale and laugh with joy about their "measurement."


Beautiful
Caring
Smart
Kind
Adorable

Instead of an arbitrary number.

 
Right before my Ignite Boise talk I had stood on this very scale before covering those numbers up with positive words, because it felt important to disclose my exact weight to the audience. I could reclaim those numbers like I had reclaimed the word fat.

I do, in fact, still keep another scale hidden in a cupboard alongside my YAY! scale, mostly used over the years to weigh my baby/toddlers to make sure they are getting enough to eat and on the right growth track. Sometimes it's used to weigh heavy packages for shipping estimates around the holidays. Every once in a while, though, I pull it out to weigh myself, especially if I'm about to speak/write about body positivity, because being honest in my work as a fat feminist is a source of pride.

Last year I wrote a story for Mamalode magazine called A Love Letter to 226 Pounds, about renewing my drivers license and the lady at the DMV refusing to update my weight. Again, part of my reclamation of my body as my own is sharing that number with the world, and not being ashamed of it.


In keeping with that spirit, I just pulled out my scale today. I'm down to 210 pounds, forty pounds less than I was three years ago when I stood on stage at the Egyptian Theater. There are many reasons for this. I've been pregnant three times since 2008. I've stopped taking birth control pills after twenty years, a medication that makes me gain weight. A few years ago I also stopped taking SSRI pills for panic attacks from an anxiety disorder that I've been able to manage sans medication. This is something I have gone through several times in my life - meds like Celexa and Paxil have historically caused me to gain 30-50 pounds within the first year on them, and later I've always shed that same 30-50 pounds when I go off of them. I'm also officially in perimenopause and my symptoms are wacky and intense, including severe morning sickness/nausea that makes me either vomit, not want to eat very much most days, or both. Weight loss is not my intentional goal, it is just something my body is doing naturally right now, finding its own rhythm at this place in my life journey, and I'm okay with that.


(This is how I really feel about the archaic brand name of my thrifted vintage bathroom scale hovering over those arbitrary numbers. Health at every size FTW!)
 
While just like proudly telling the world that I am 40-years-old, I will always powerfully declare that I am also 5'5" tall and 250 226 210 pounds and that I (usually) wear a size 22 20 18 and a 40C bra. And the freedom that comes with sharing those numbers is amazing. But none of these numbers really measure me. I'm more than a number on a scale. I am, in fact, so much more than my body at all.

I hope you know that, too.

THRIFTY: Homemade Bath Goodies

Every year for the holidays, the girls and I love making homemade and handmade gifts for our friends and neighbors. Often it's baked goods, like my family-famous pumpkin bread, candy or cookies. Some years, though, we get a bit more ambitious and want to make something new and offbeat, not your traditional Christmas goodies. This past year was one.
 
 
As always, I love to use inexpensive ingredients and reuse and repurpose items. This fall we had harvested our lavender plants, dried the flowers, and put them in the freezer to preserve. I had also saved this bath sachet recipe on a Pinterest board several years ago and knew these would be perfect.


I had a box of powdered milk in my pantry, as well as oatmeal, rubber bands and twine. I ran to my neighborhood Dollar Tree and grabbed a few boxes of baby washcloths, which were 4 for $1. You could, however, just use any scrap of fabric you have, cheesecloth or muslin.


I think the images do justice in place of written explanation on how to make these (read: SO EASY). I typed up these little directions, printed them off, cut them and attached the to the sachets.

OATMEAL LAVENDAR MILK BATH SACHET | Tie the twine to hang the bundle under the faucet as hot water fills the tub. Squeeze the sachet to release the herbal properties into the water, or swirl the sachet around in the tub. The tub is now your giant cup of herbal tea! Once the bath is over, shake the wet herbs into a flowerbed, compost, or other container for disposal. The washcloth is yours to be used again!


In addition to the bath sachets, Alice and I whipped up some brown sugar coffee scrub. Every day after drinking my pot of java, I dump the grinds onto a large tray in the garage to dry. Once dried (this may take a few weeks because you really want them to be very dry), you mix the coffee grinds, brown sugar, olive oil, a tiny bit of vanilla extract, and a few shakes of cinnamon. I used a version of this recipe, but quadrupled it to make a lot more. Having a plethora of baby food jars from Arlo, I spray painted the lids a festive red, filled them with this yummy scrub, and tied on a cute paper tag. This scrub is ideal for dry hands and feet and works really well. It makes a huge mess of coffee grinds if used in the tub, though, just FYI. For this project, I had all the ingredients on hand, and repurposed the jars and paper tags, so it cost me next to nothing. Both projects turned out great, were fun to make in the kitchen, and so easy for the girls to help with. They'd be perfect for Valentine's Day or Mother's Day, too!

ARTSY: Dia de los Muertos Skulls

I'm a huge fan of the Dollar Tree just a few blocks from my house in Vista Village shopping center here in Boise, especially around the holidays. Their décor is killer, and so much fun to be creative with without costing much at all.


 Last year I saw (too late) these large felt skulls, probably 18" tall by 12" wide in both white and black for a dollar a piece. By the time I thought about crafting them up to make darling Dia de los Muertos skulls and went back to the store, they were all snatched up.


This year I bought three, one each for Lucy, Alice and I to try our hand at. While I originally thought I'd get out my embroidery thread and needles for some cute stitching, I quickly changed my mind because, um, crafting with kids is sometimes hard enough without making it harder (am I right or am I right?). A faster, easier method of getting the same colorful details as thread? Brightly colored Sharpies.


Pull up some sugar skull and face painting images of Day of the Dead from the Internets for inspiration. Add in a few tubes of glitter glue, sequins and leftover Mardi Gras mask making feathers. Voila! Cutest decorations to grace our front window during any Halloween season we've had. (Pro Tip: the plastic hanging hook that the price tag was attached to? Don't rip it off. Use it to hang your skulls on a tiny suction cup hook on your window!) I even ran back to the Dollar Tree to snatch up three of the black skulls to craft up next year before they ran out. Again.

THRIFTY: 6 lbs of Gummy Bears

A few months ago we happened upon a gigantic 6 pound bag of gummy bears at our local Costco. We laughed about it because it's Dr. Brown's most favorite candy, but it was only about $8, which was really a steal when I started thinking about it. So, much to his surprise, I tossed it in our cart.
 

I knew, however, that if I didn't do something smart and creative and snacks-sized with these treats immediately they'd all be eaten within a week. (The doctor and his two daughters have incredible sweet-tooths. Teeths? Whatever.) So I opened the bag and divided them immediately into 8 oz. canning jars. That bag filled SEVENTEEN of these jars. 17. I was amazed, and thrilled. I doled out one jar every day or two for them to share, hiding the other 16 in a top secret box in the garage. (I'm not mean, for reals. It's just that they would've gone out to the garage and gotten more jars and eaten them all quickly. I'm so serious.) They lasted for weeks this way and if you do the math, each jar came out to something like 48 cents for 8 oz of gummy bears, which is such a deal.

KIDDOS: Handmade Play Kitchen

For Christmas this year, I was super excited to make the girls a play kitchen out of a recycled piece of furniture. I'd seen some cute ones on Pinterest, made from old entertainment centers and night stands. In September, I found an used, unpainted little boy's tool table at the Idaho Youth Ranch for $13. I new it was perfect, and loved the pegboard backdrop, which would be perfect for hanging tiny pots and pans a la Julia Child. We hid the kitchen in my mom's shed.

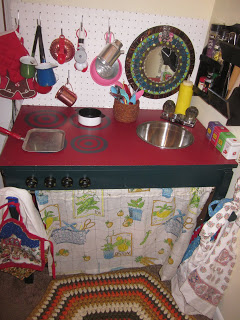
We (okay, rather, my mom) painted it red, green and white using leftover house paint she had in the garage. I bought a used faucet at Second Chance, our local architectural salvage shop and my mom had an old mixing bowl we used for the sink. I used the black plastic wheels off of a toy car to make oven knobs and Eric picked up some pegboard hooks at the hardware store.


I hand-painted on the stove burners, and all the other supplies I took from around the house and the playroom. I collected all the girls play food from various locations and put it together in bins underneath the play kitchen. I hemmed a vintage kitchen curtain to fit on a tension rod under the sink to hide them. Vintage aprons, pot holders and a rug were picked up for super cheap at garage sales. I mounted an old phone and some shelving we had around the house on the wall to complete the ensemble. And that darling mosaiced mirror was a birthday gift to me from my talented artist-friend, Reham Aarti. Eric and I spent hours perfecting the little kitchen set-up on Christmas eve, and decided at the last minute to put the girls' table and chairs in the playroom to complete the dining atmosphere. It's provided hours of imagined play for every kid that's stepped foot in this house since Christmas. And the whole project cost around $25!

STYLE: T-shirt Revamp With Men's Tie

I follow Craft Gossip on Facebook and saw this link to this blog's tutorial on upcycling an old t-shirt with a men's tie. Eric happens to have a plethora of old, quirky ties lying about, so I snatched one up.
My blue tee had another stain on it (as most of my tees do) so I crafted a few little fabric rosettes to cover that up, and to adorn the tie.
In the original tutorial, she uses a vintage button, which I also think would be darling. But this turned out pretty cute, don't you think? I can't wait to make more!

ARTSY: Wintry Market + Ticky-Tacky


Early last spring, my friend Kristin Montgomery and I met for brunch and discussed Boise's need for a quality handmade arts and crafts holiday market. We had both noticed that our local handmade shops and markets were expanding and seemed to be successfully operating on a grassroots level that we both appreciated and enjoyed. We knew that we could add something special to the holiday scene and thus, Wintry Market was conceived!
We quickly secured Ballet Idaho's stellar auditorium space, thanks to the community-building mindset of their new development director, Heather Langhorst, and her commitment to artists supporting artists locally. Local animator Jason Sievers created our fabulous poster and we soon had all 30 available booths at the Wintry Market filled with some of the best makers in the state of Idaho. Big City Coffee was thrilled to help our customers satisfy their caffeine fix and sweet tooth and B29 Streatery is ready to park their popular food truck in the Ballet Idaho parking lot for the weekend.
Co-creating the Wintry Market has also allowed me to finally fulfill one of my dreams of starting my own vintage shop. I call it Ticky-Tacky, and it's a carefully curated vintage shop full of reloved and reused items for the home and the holidays. Items have been thrifted, repurposed, and handmade by yours truly. You guys, I'm so excited to share the goodness!
There'll be killer vintage Christmas goods! Clothes! Purses! Kids decor! Art books! Crochet! Needlepoint! Crystal! Melmac! Ticky-Tacky is overflowing with so much greatness it's gonna be hard for me to part with all the retro lovelies I've selected. Of course, everything is one of a kind, and is certain to go fast, as I'm a firm believer in reasonable prices. Vintage homes FTW!
So, if you're local, help us ring in the holidays season by attending the inaugural Wintry Market and supporting Idaho's artists and crafters. Seriously, you're sure to find the most unique and hip holiday gifts around. And, I'd love for you to stop by the Ticky-Tacky booth and say hello.
Here's the deets:
Wintry Market Handmade for the Holidays
Ballet Idaho auditorium
Corner of 8th & Myrtle, in downtown Boise's BoDo District
Sat Nov 5 & Sun Nov 6, 2011
10am-5pm
FREE ADMISSION
+kids recycled arts corner!
+coffee and snacks!
+quirky holiday photo booth!

STYLE: Vintage souvenir travel plates

It's probably only been about a year now that I've been collecting vintage souvenir travel plates. But I'm a wee bit addicted to hoarding quirky things.
I find them, typically, at rummage sales and thrift stores and have never paid more than $4.99 for one, and most are around $1. They were popular tourist trinkets in the 1950s and were made for most states, large cities, and national parks. I've found some odd ones, like for the National Cowboy Museum in Oklahoma, and, for some reason many local churches marked significant anniversaries with commemorative plates.
Events like the Seattle World's Fair in 1962 (when the Space Needle made it's debut) were also popular to memorialize in a plate, and the dimensional relief on this particular piece if pretty great. They often hung on the walls of people who bought them, servings as memories of family vacations and roadtrips, made doable by the automobile in the mid twentieth century.
The plates went out of fashion and people are getting rid of them now, gifting them to the Goodwill as they find them in old boxes of grandma's stuff. As a sucker for Americana and kitsch, I'm intrigued by the architectural features and natural wonders chosen to represent each state/city on their plate. It's telling of the time and era, and also acts as a historical document, as this New York City plate does, with the Twin Towers standing tall pre-9/11.

KIDDOS: Big Blue Birthday Bash

As most of you know, both Alice's and Lucy's birthdays fall in April, just two weeks apart. Therefore, for the rest of their lives, they'll be forced to have a joint party. So far, this has worked out well, as their four year age difference hasn't really caused a thematic problem yet. This year I had the girls pick a color to coordinate the theme around and much to my surprise and delight they chose blue.
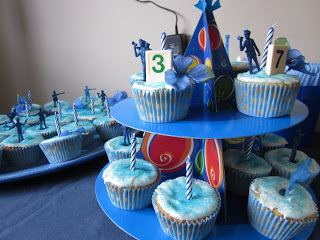
I happened to find plain blue t-shirts for them at the dollar store and ironed on letters I had in my crafty stash to spell out their names. I also found these funky blue paper hats at the dollar store, hot glued some blue silk flowers on and cut out their birthday numbers with some old Contac paper I had. We made our invitations out of paper cutouts of blue balloons tied with blue string and invited our guests to share in the celebration by wearing the color du jour.
The party was originally scheduled to be at a local play park outside, but the stormy spring weather didn't really cooperate. At the last minute we changed the locale to our house, and I set up the ever-popular recycled art station in our garage. It was a huge hit, especially with the 7-8 year old girl crowd.
I am not a big fan of junky birthday party favors for kids, so we went with these packages of fizzly fruit Skittles we found on sale for 50cents a piece at the local Rite-Aid and tied them with blue yarn. The kids also, of course, got to take home any art project they made in the garage.
I made these homemade basic vanilla cupcakes from the Fannie Farmer Baking Book with The Pioneer Woman's basic cream cheese frosting, topped with colored blue sugar. Blue and white polka-dotted cupcake papers and blue and white striped candles topped the mini cakes, as did blue plastic police officers we found at the dollar store. Two thrifted Rummikub game pieces with the girls' birthday years on them marked their cupcakes.
Of course, the decor was all blue - from tablecloths to bowls and plastic forks to platters. We kept the other decorations simple, stringing blue streamers around doorways and Eric picked up 6 or 7 blue star shaped mylar balloons that morning. As the party was from 2-4pm, we had finger foods and lemonade for snacks. Again, the best parties seem to be homemade on a budget and this time around with a simple color theme, the dollar store was really a treasure trove.

THRIFTY: Homemade Dishwasher Detergent

For the past four years, I've become increasingly obsessed with consumption, reuse and recycling. I chronicled our adventures about living on The Compact in 2009 here, as well as my turn as a radical homemaker. I've recently become very interested in this zero waste home and blog - a family in California who either composts, reuses or refuses unnecessary junk into their lives, particularly in the way of food and product packaging.


This year I've decided to experiment with a few homemade household items. When we ran out of dishwasher soap last week, I researched a few homemade options. There are a ton of recipes and recommendations out there on the Internets, but I decided upon 1 cup Borax mixed with 1 cup baking soda. Put in a jar and shake. It's that easy. I use a tiny plastic scoop that I think came with some coffee once as my measure. It is probably about a tablespoon in size, and I typically use one scoop per load. For the rinse agent, I've been using plain vinegar. So far, so good. The only problem are the hard water stains on our glassware, which admittedly were problematic even before changing up the dishwashing soap. Perhaps the vinegar isn't quite cutting it? Hmmm. Again, it's only been about a week, so in a sense the jury's still out on this one. I do think my new concoction is doing the job just as well as the more expensive commercial detergent we were previously using.


Stay tuned, as I'm moving on to making more household items from scratch. I gave up shampoo and conditioner in favor of baking soda and apple cider vinegar a few years back, and am excited to try my hand at homemade deodorant and toothpowder next.

CRAFTY: Making Old Stuff New Again

It's finally fall in Idaho, as it seems the 90 degree days are now gone for good. It was a little disconcerting, even as a sun worshipper, to be spreading our cotton spider webs around the rose bush and putting out our 'TRICK OR TREAT' doormat in shorts and tanks. And I couldn't be more happy to welcome the 60 degree overcast mornings, pull our sweaters out of storage, and cuddle up in my Snuggie with morning coffee. It's time.

Along with the change in seasons and weather comes the inside time after a long summer spent under the blue skies. I like that shift indoors, even though with it comes bigger messes and the occasional bouts of cabin fever. Luckily, we've got things we love to keep us busy this time of year - our overflowing bookshelves and my trusty Singer sewing machine. As always, I'm really big on recycling old things into new and love the challenge an overlooked object presents. Over the past few months I've discovered a really great way to use the girls tattered, torn, or stained clothes and make them into something new and usable.


I've been cutting out patterns or appliques from undamaged parts of their old t-shirts and making them into 'patches' to cover up small stains or tears on perfectly good wear. You can see here I covered the bum in a pair of Alice's blue shorts with a pink ballerina and cut some hearts from another tee for her little turtleneck. I've been using whatever fun color of thread is currently in my machine to add to the funkability factor of these patchwork items and I love the way cotton jersey rolls a little when you stitch it on.

Another great idea (which I stole from this blog) was to cut off the girls' pants into shorts when they still fit everywhere but the length. We did this all summer with jeans and 'jama pants and it's a great way to prolong the life of clothes, especially with wee ones that grow so fast. (We did the same with Alice's onesies, making them into little t-shirts.) I discovered that Alice's tiny pant legs, when cut off and turned upside down, looked like the perfect doll skirts, with the elastic waists already in place.


So one night Lucy cut out patches and picked cute stitches on my machine and we whipped up four skirts in no time flat! We could've cut some shorter for baby dolls like this one (or even added straps!) but thought it looked cute as a strapless dress, even though it's a wee bit inappropriate for a baby her age.

We also could've easily hemmed the skirts, but thought the ragged denim look was hip. It would be fun to pick up some infant pants at thrift shops and add other iron on patches and the like for little girls' birthday or Christmas gifts as well.

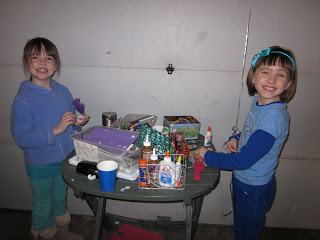
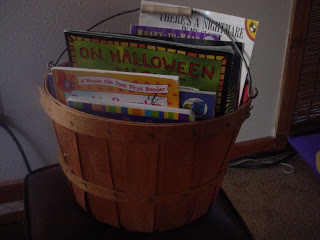
My friend Kristyn gave me this cute idea the other day for the month of October: gather all your Halloween books into a basket for a special seasonal reading nook. This is especially great for those parents, like me, who are a little too unorganized to put away holiday books and only pull them out once a year.

Alice and I had fun rummaging through our numerous bookshelves in search of books, and came up with more than I even knew we had. We took liberties with the theme and included books on fall, monsters, and spiders, too, and put them all in one of our apple buckets. We are avid readers here and my kids (like yours, I'm sure) get hooked on one book and want us to read it TEN THOUSAND TIMES IN A ROW. So this is a fun way to rethink about books you already own and celebrate the season. I love this idea so much that I'm continuing it into the winter. So, what about you? Any hobbies you reintroduce in the fall? What are your favorite ways to make old stuff new again to your kids?

THRIFTY: Marvelous Moscow Finds

Our summer was pretty much spent on the road, traveling to fabulous Idaho retreats and wilderness weekends. It was absolutely the best summer I've had in years. We spent time in our tent and numerous cabins, roasting marshmallows, browning our shoulders on lakes, catching water snakes, celebrating family, slipping down water slides, and drinking beer under the stars. Of course, I made sure to stop at garage sales in Idaho Falls and every thrift store in Moscow. And, wow, did I really make a haul. These are just a few samples of the goodness that I hauled home from the northern part of the state.


First of all, I couldn't believe how inexpensive the thrift shops were in Moscow. For a college town, the prices were really reasonable and not at all jacked up like they often are. Also, I noticed how many more shops there were than when I lived there in the early 1990s. Lucky kids. Anyhow, I found several great VHS tapes (yes, we're still old school like that) for under a buck a piece, including our new favorite The Sound of Music and our not-yet-favorite-because-it-scares-the-shit-out-of-Lucy Gremlins. (A big oops on Mama's part, but we'll hide that one for now and try it next year.) Alice's new favorite is Mickey Mouse, so these Disney glasses have a great, clean, retro sensibility and fit in nicely with our others at 50cents a piece. The large green plastic platters and iron-on letters are GLITTERY! which pretty much means I'll buy them. Glitter is big in our house, and those silver letters are about to adorn some super cute Christmas gifts. And those glitter platters will also be adorned by some super yummy Christmas cookies when the season rolls around.

On that note, I also picked up some killer vintage finds for holiday and birthday gifts because I'm crafty and think way ahead. They aren't pictured here, however, because some of you lucky recipients read this blog. I've been collecting retro cake carriers lately and can't get enough of them. Especially when they are in great condition are are only $2. And I've been collecting vintage Pyrex for quite some time, so when I found these two lovelies for $4 and $2 I had to have them. The little gold frame is for an upcoming art exhibition/project I've been invited to participate in by contemporary dance genius Trey McIntyre. And those darling orange glass candlestick holders? Perfect for Halloween! All in all I spent less than $30 total at Moscow's three thrift shops, around $10 at each store. I got so much more than this, including my new favorite Idaho Vandals t-shirt and sweatshirt, a sketchbook for Lucy, and some great back-to-school gear!