CRAFTY: Handmade Kids Toys

Since we were still operating on The Compact this past Christmas, all of our gifts were either handmade or purchased second hand. I thought I'd highlight a few of the gifts for our girls that we made, as they turned out to be very cute and some of their new favorite things. They are certainly gifts that would be ideal to give at any time of year, especially for birthdays.


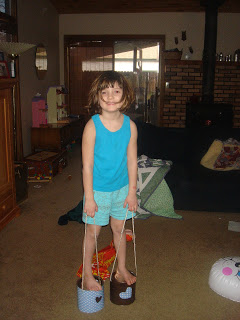
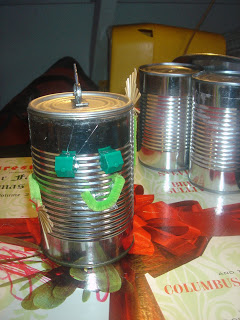
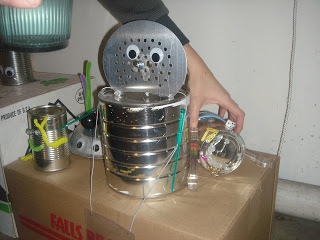
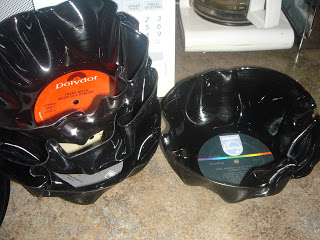
I found the idea for these adorable and easy handmade stilts on one of my favorite mama craft blogs, www.zakkalife.blogspot.com. She has a whole slew of darling kiddie crafts and other ideas that I've also used. I decided to use coffee cans for Lucy's stilts, as they are a bit larger and more study. I covered them with some scraps of vintage Contac paper I got at a thrift shop. Eric drilled small holes in the sides to loop some rope through and voila, they were done in like 20 minutes. They are great for indoor and outdoor fun and her friends have come to love them as well.
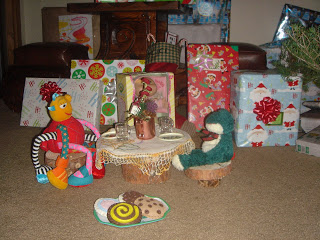
I got the idea for this dolls-sized log table and stools from this cute website for green, recycled kids craft ideas. "Santa's elves," also known as Eric and his brother Dominic, took some of our firewood into Dom's shop and fashioned this little set for Alice's Santa gift. They are rustic and are also great for imaginative play both indoors and out. I found the stuffed creatures and tableware are a variety of antique and thrift shops for super cheap. The best part, however, are the handsewn felt cookies I found from local Boise Etsy seller, Vivian, who owns and makes the best culinary creations on Time To Play. They were around $10 for 6 cookies, and I got to pick the "flavor" and frosting colors. The cookies are really well made and SO DANG CUTE I can't even tell you. Her work is stellar and I can't recommend purchasing from her enough.

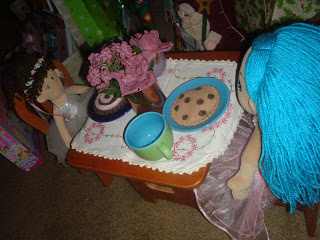
Santa brought Lucy a similar set up, but her wooden table and chairs were an amazing thrift shop find. Her ballerina dolls also came from thrift shops, and both girls' table linens came from my mother and grandmother's collections.


Lucy and Alice were thrilled with these gifts, and they have really sparked their imagination with play. The cookies are a constant hit, and the table settings have already hosted a number of tea parties for other stuffed pets and Barbie friends. I find these simple toys to often be the most interesting in the long run. They may not be the fanciest or the flashiest, but they are heartfelt gifts that kids are sure to love.

FOODIE: Handmade Valentine Goodies

My dear friend Kristyn invited the girls and I to join in on her tradition of making homemade chocolate candies for Valentines Day treats. I was thrilled, as I don't have a lot of experience with making candy and was excited about the possibilities. She bought the ingredients and provided the expertise and the kitchen, and I brought my girls and some crafty supplies for making cute recycled containers for the candies to go in.

Being a southern belle herself, Kristyn has grown up eating and making Food Network chef Paula Deen's goodies. On the menu were Deen's Almond Chocolate Balls, her peanut butter Buckeye Balls, and some mini red velvet cupcakes (these were from the box because, seriously, we're amateur chefs and mothers, not crazy).


Unfortunately, I didn't get any pics of the candy creating process, as it was a bit chaotic in Kristyn's kitchen with two demanding babies under our feet and two kindergartners asking for more glitter and sprinkles. Also, candy making is a bit of a time consuming process, especially melting the chocolate in a double boiler and dipping each one quickly. Anyhow, when you click on the above links for the recipes and tutorials, you'll notice immediately that my Buckeyes look not near as nice and polished as hers. Clearly, my Almond Chocolate Balls above, which basically taste just like Almond Joy bars, are not ball-y at all. Have you been reading this blog a while? I'm CLEARLY not a perfectionist.

I was surprised how easy the candies were to make, and how few ingredients they required. Additionally, we came up with some really darling containers, handmade by our children, to box up the candies in. The silver painted container is a baby formula can with the label stripped off (the lid is also cute with pink paint and tons of glitter, but is currently lost somewhere in my girls' playroom). The red containers formerly held sliced deli meat and are decorated with felt, glitter and stickers. A cream cheese container is covered with Contac paper, gingham fabric hearts and glitter (in the foreground).

We lined all the containers with valentine themed cupcake papers and stacked the candies inside. Here you can see we used individual apple sauce containers covered with plastic wrap and ties with pretty satin bows. These sweet little packages were valentines for Lucy's three teachers.
Valentines Day can be a sweet holiday when filled with heart-felt lovely surprises. All our candies are accompanied by hand-colored cards that Lucy made for our family members. I have to say, it is way less stressful to make homemade candy on a holiday other than Christmas. It's made these gifts much more special to make, give, and receive thus far. And my two little cupids have a few more deliveries to go.

AMY & REE: Edna Mae's Sour Cream Pancakes (week 6)


It was Super Bowl Sunday morning, and we were planning on lounging in our 'jamas all day, taking in some good eats and a little football. (I was wishfully thinking it would be a little football, but it turned into an entire day devoted to football.) We started off the morning perfectly with this recipe from The Pioneer Woman's grandma-in-law, Edna Mae. These homemade pancakes' secret ingredient is sour cream. That, combined with the eggs, make these pancakes YUM-O. They end up tasting a bit like french toast in pancake form which, according to Eric, makes them PERFECT. These are his new favorite pancakes ever, he says. Actually, the girls loved them, too, and with a side of bacon, this may actually be perfection on a plate in breakfast form. And we all know that I love breakfast more than any meal of the day, and plan on making these again soon. Hopefully for dinner, if Eric will allow it. You can find the entire recipe here on this girl's lovely noshing site.

AMY & REE: Lasagna (week 5)

So, this week I was totally organized in my shopping, had all ingredients on hand and spent one entire afternoon crafting The Pioneer Woman's homemade lasagna. The one thing I was NOT organized about was remember to take a photo, so I apologize for this little post with no images to look at. (Click on the link above to the recipe on PW's blog and her much more amazing photography skills.) Anyhow, the recipe was a bit time-consuming and makes a HUGE pan of lasagna so, instead, I split it into two 8x8" pans and froze one for later. My girls both loved this basic lasagna and Eric thought it was delicious. I thought it was just okay, but I'm a sucker for lots of fancies and veggies in my lasagna, which would be easy enough to add next time around. Also, it made for great leftovers, which is very important in my book.

KIDDOS: Robot-o-Mania

One of our fun weekly playdates for our Sun and Fun Playgroup last month was a robot-themed party at my house. I stole the idea to make robots from this blog and started collecting materials, both from the garbage and the tool shed.

I set up the supply station in my garage. We used a variety of cans, from old pie tins, pots, baby formula cans, and soup cans for the bodies. The accessory parts were displayed in an old game box tray as well as my muffin tins and included things like buttons, bolts, Monopoly game pieces, bottle caps, plastic bread clips, bobby pins, paper clips, wire, magnets, and beads. There were also Sharpie markers, pipe cleaners and stickers.

The kids had a blast picking out their bodies and crafting their versions of robots, aliens, and UFOs.
The parents had a station set up with hot glue guns and applied the items as directed by the kids. We had so many supplies and such fun creating, that the kids each made 2 or 3 robots a piece. In fact, I made 2 or 3 myself. And Eric made one that night when he got home from work. We now have a whole heard of recycled sci-fi characters lining our fireplace mantel.

While the kids created, the parents ate and ate and ate and talked the afternoon away. After the robot making, we made popcorn and watched the movie WALL-E, which happens to be one of my favorite kid films of late. It was a really fun, creative afternoon and a great way to get kids experimenting with found materials in an unusual way. The whole event cost nothing to put together but a little time and imagination and turned out to be one of our most memorable January days.

AMY & REE: Pizza Dough + Potato-Leek Pizza (week 4)

Now that I'm brave about the yeast, this week's Pioneer Woman cookbook recipe was her homemade pizza dough that later turned into her Potato-Leek Pizza. The dough was super easy, but required some planning, as it has to rise on the counter for about 2 hours. It makes enough for 2 pizzas, so we made a pepperoni one for the girls and an "adult" one from the cookbook, which includes leeks, goat cheese, BACON!, and red potatoes. I've had yummy pizzas with unusual toppings before, including potatoes. In fact, I love pizza so much that I'll eat it with almost anything on it (except pineapple). I have to say, however, that neither Eric or I were in love with this pizza. It was just okay, in my book, and I preferred the girls' pepperoni. Could've been the mood I was in. You give it a shot and let me know what you think.

AMY & REE: Cinnamon Rolls (week 3)

I apologize for this being a week late and, for that matter, that nothing has been posted on this blog for as long. Our family was asked to partake in a "back to the basics" type survivalist regime for a whole week, part of which included no television or computer use. What kind of madness is that, you ask? Don't worry - you'll be reading more about what we learned in the near future.

Anyhow, last Thursday I began making PW's homemade Cinnamon Rolls from scratch. I had never made these delicious treats from scratch before and, to be honest, I'm a bit scared of using yeast. My fears, however, have been conquered by the delicious, gooey goodness that was these rolls.


Many of you, undoubtedly, have made rolls like these before. I was excited to try them for Lucy's little after school pajama party last week, where the kids wore PJs, watched cartoons, and ate breakfast. Before making the recipe I should've noticed that it made 40-50 rolls, but, of course I didn't. Therefore, I ended up with about 5 extra trays in my freezer, which is alright by me. I split the dough in half and rolled it out into this massive rectangular shape before pouring massive amounts of butter and sugar on it. To be honest, I was a bit taken aback by the amount of white flour called for (9 cups!), so I used half whole wheat flour instead. Also, I only poured 1/2 cup melted butter on the dough instead of the 1 cup it called for. Even that was a lot.

Unfortunately, I didn't get a photo of the finished product, but you can see one by clicking on the link to PW's recipe on her blog, highlighted above. Here is one pan of the rolls rising on the counter before I plopped it in the oven. Mine were slightly long and narrow when I sliced them, but puffed up during the baking. No one even noticed that I used less butter, as the wonderful maple icing you pour on top after they're done is delightful. Also, the wheat flour gave them a nice, nutty flavor that was a hit with all the mamas and kiddos alike. Lucky for us, we'll be reaping the benefits of this baking extravaganza for weeks to come.

AMY & REE: Simple Perfect Enchiladas (week 2)


I actually made these enchiladas for dinner last Friday night, but, after the long weekend, am just getting around to posting about them today. We love Mexican food at this house, and any excuse to make margaritas is good enough for me. So, I embarked upon Pioneer Woman's Simple Perfect Enchiladas, one of the recipes found not only in her new cookbook, but also on her website. They are, as described, simple beef enchiladas using corn tortillas because she claimed flour tortillas often get soggy in the making, which I happen to agree with. I don't think these enchiladas can really be described as perfect, though. Although Eric and I thought they were good, they weren't anything I'd necessarily make again. They did hold up as leftovers, however, and proved to be just as good warmed up in the microwave the next day.

ARTSY: Vintage Record Bowls

This is seriously the easiest crafty project ever and has become my favorite go-to gift of the past few months. I've seen these around at art fairs, etc. and always wanted to try my hand so I Googled instructions. There are several sets of instructions out there now, including a few YouTube videos as well. We made these at a recycled Christmas crafts girl party I held in November and they were a huge hit with my arty friends and, again, so easy.

First you start with the records. My neighbor gave me two huge boxes of old records that didn't sell at her garage sale last summer, so I already have a great stash, but you can pick them up for around 50cents a piece at any thrift shop. For the holidays, I used lots of old Christmas albums, but it's fun to select a group based on the gift receiver's tastes. And don't worry, I went through the boxes first and pulled out the all the albums worth keeping because I love listening to vinyl.

Preheat your oven to 200 degrees. Find two glass mixing bowls that nest together nicely, and place the smaller one upside down in the oven to preheat as well. Then, center the record on top of the bowl and close the oven door. Check on it, oh, 5 minutes later and it should look something like this:

Please PAY NO ATTENTION TO THE DIRTY OVEN FLOOR, but do notice how the vinyl has softened and is drooping over the sides. At this point, carefully place the larger glass nesting bowl on top to smoosh down the sides. Leave them like this in the oven for about 1 minute. Remove the whole shabang with oven mitts and let sit for about 1 minute on top of the stove to cool. The vinyl will harden quickly and pop easily out of the glass bowl molds, resulting in the cutest things ever:

It's hard to tell from this picture, but the ruffles on each bowl are darling and unique to each bowl. They look like ribbon candy, especially if you're lucky enough to come upon the colored records at the thrift shop. While they are not food safe, they look great on a buffet to toss keys or spare change into or in the bedroom as a jewelry catch-all. I lined them with newspaper and filled them with microwave popcorn, nuts and hot cocoa and handed them out as New Years gifts for my extended family. There are wonderful artists doing more elaborate and cool things with reused records, especially here in Boise, but this is an easy, make-it-yourself gift for all ages.

AMY & REE: Maple Pecan Scones (week 1)


For those of you with The Pioneer Woman's new cookbook in hand, you'll notice right off that I am not going straight through, making each recipe as listed. Oh no, I'm hand picking the one I want to make/eat each week, and for some reason these Maple Pecan Scones appealed to me. Um, could it be that I didn't learn my lesson when the scale shouted "YOU'VE GAINED GAINED FIVE POUNDS OVER THE HOLIDAYS, LADY!"? I guess my sweet tooth was shocked into overdrive or something, because I decided to make the sweetest, butteriest, melt-in-your-mouth scones ever as my first shot with my new cookbook and my new New Year's Resolution.

It was a challenge for me, though, as this was my first time making scones (I told you, I'm an amateur chef). First off, I don't own a pastry cutter and decided that I should invest in one after trying to use a metal spatula to chop the cold butter into the flour mixture. I should probably also check to make sure I have all ingredients on hand before starting a recipe, but that's not how I roll. Some things slip my mind, like how we'd used all the eggs in the house for breakfast that morning instead. So, I sent Eric on a grocery emergency to pick some up while I chopped and chopped incessantly with that damned metal spatula. Once the egg was mixed in, the dough was crumbly, which PW said it would be. However, I couldn't even get the stuff to stick together long enough to roll it out with my rolling pin. Finally, however, after making several small dough balls and mashing them quickly together I was able to create a sort-of shape that I could cut the large triangular scones from. It turned out that this didn't matter, because they baked to perfect, golden perfection and the amazing maple frosting sauce that I literally smothered them with (see above photo) was too die for. My girlfriend, Kate, and I had one with tea that afternoon and oohed and ahhed. I had to take some to my neighbors so I wouldn't eat the whole pan, they are that good. Next time, though, I think I'll cut them slightly smaller because they turn out to be really rich (could be the 1/2 lb. of butter, no?).

AMY & REE: A New Year, a New Cookbook

So, I mentioned in a previous foodie post that I loved the movie Julie & Julia. I also enjoyed the original blog, "The Julie/Julia Project" written by writer and food lover Julie Powell, where she documents a year of her life cooking her way through Julia Child's classic, Mastering the Art of French Cooking, making all 536 recipes in 365 days. I was inspired by Powell's ambition and her contentment in the kitchen. I'm also a bit obsessive and love the challenge of committing to doing something for an entire year. With The Compact complete, I need something new to set my mind to. I have a slew of other traditional New Years Resolutions which are all serious, not that fun, and not likely to last, so I was looking for something intriguing and interesting. Like Powell, I love to cook, but I'm not nearly as adept in the culinary realm as she is so there was no way in hell I was taking on Julia Child.

I am, however, a huge fan of Ree Drummond, aka The Pioneer Woman, and have been a fan of her cooking website for several years now. I've made a good many of her recipes in the past and they never fail me, like her sinful Apple Dumplings and her yummy Simple Sesame Noodles. So when she announced her first cookbook was due out this fall, I immediately put it on my Christmas list. And guess what I found under the tree on December 25th?


Damn straight. I was thrilled! And then I thought, wait, Ree is right up my alley. Accessible, down-home cookin' with great pictorial step-by-step directions. Her ingredients are easy to find and don't break the bank. She didn't go to culinary school, she makes a big mess, and feeds her family with love. It doesn't hurt that she's funny, quirky, and a great writer, either. As I read the book cover to cover, I began my plan of attack. Her cookbook contains around 60 recipes, which is perfectly doable in a year. This means I have to make about one a week, which is all I can commit to, considering the chaos that is my life with toddlers as a new SAHM.

In the beginning of the book, she also offers up some "must haves" in her kitchen for us amateur chefs, which included both a cast iron skillet and a dutch oven. I have now excitedly purchased these lovelies in red and am getting used to using them. They are wonderful to cook with, and I can't believe we have lived without them. I can't wait to expand my culinary arsenal and push myself in the kitchen in new ways. So stay tuned, as I'm inviting you all along on this delicious journey with a new weekly column called "AMY & REE." You'll get tales of my attempt to become a better person, or at least a better cook, in 2010. It should be full of follies, treats, laughs, and, undoubtedly, a few extra pounds.

Mission Complete: The Compact 2009

Last May I wrote a post on this blog about our family's 2009 New Year's Resolution to live The Compact for an entire year. For those of you who are new readers, you can click on the link above to read more about The Compact but, in a nutshell, it's a philosophy and a lifestyle that combats our increasingly consumerist culture, the one that got us into this nasty recession in the first place. Basically, there is one basic tenant: buy nothing new for an entire year, with the exception of food, medicine, underwear and the like. You must borrow, barter, or get everything used, as a means of reusing, recycling and reserving resources. When purchasing services, The Compact suggests supporting local businesses. Admittedly, I am extremely thrifty and have a keen eye at flea markets, so this concept appealed to that part of my personality. We were already avid recyclers, so that part of The Compact seemed easy enough, too. I had to talk my husband, Eric, into it, as he was a little leery about living an ENTIRE YEAR without purchasing power. As it turned out, a few months into 2009 I was laid off from my job, in which we lost nearly half of our income. At this point, The Compact took on an important role in our financial health, as frugality became key to our survival. All in all, I've never had a New Year's Resolution be SO MUCH FUN. What could've been seen as a struggle or a setback turned out to be so much more refreshing and rewarding than we thought imaginable. Here are a few highlights:

Making new things out of old items really fueled our creative juices. I sewed clothing and library book bags. The girls really got into making objects for their friends' birthdays. We made Christmas gift tags out of old greeting cards and gift containers from old yogurt tubs.

We also began eating at home more and took pleasure in making our meals from scratch with our own hands. The library offered a great resource, as we explored different cookbooks, especially for foodies on a tight budget. Our friends offered their talents as well, sharing their knowledge on canning and gifting us fresh produce from their summer gardens.
As I mentioned earlier, thrifting is a pastime I was already passionate about, but The Compact took it to a whole new level. Before, I would go to garage sales or thrift shops for fun to see what I could find, but this past year I learned how difficult, yet exciting, it is to search for specific objects. Like white Little League baseball pants. Or large flower pots. I also learned to really utilize other local resources, from online forums like craigslist , Ada County Freecycle and the Boise Barter group on Facebook, to local shops that specialize in gently used gear like Play It Again Sports and Kid to Kid.

Our family has always explored fun, free family-friendly activities in our community, but with my new non-paying gig as a stay-at-home-mom, this was imperative. Not only for my mental health, but for our financial health as well. Lucky for all of us, the Treasure Valley offers a plethora of cheap activities to do, especially outdoors. We spent most of our summer exploring the local parks and watering holes with our bright blue picnic basket in tow. The cooler months have offered much of the same, but we've traded our picnic basket for sleds and thermoses.

I'd be remiss, however, if I didn't acknowledge the difficulties we encountered via The Compact. It was a little hard to find quality used adult shoes when Eric or I needed them. We found out the hard way that not everyone appreciates thrifted or handmade gifts for their birthdays or Christmas, which just goes to show how consumer oriented our society has become. I don't mean to be preachy, but it would better us all, and our Earth, to take at least one or two of The Compact's notions to heart. Even something simple like support our local businesses and get a delicious, thick handmade lasagna at Cucina di Paolo instead of The Olive Garden next time you're craving Italian. Or wrap your holiday gifts next year in newspaper and top with these cute creative bows rather than spending a fortune on shiny giftwrap at Walmart. Little steps go a long way in taking care of our environment, our economy, and ourselves. After reflecting on this past year I can't believe how fulfilled we are with less and what a great journey it's been. And like all good and successful New Year's Resolutions, The Compact has become such an ingrained and important part of our daily lives that we aren't giving it up at all. That's not to say I might not succumb to the occasional sale on tank tops at Old Navy or the McDonald's Happy Meal with the new Alvin & The Chipmunks toy that Lucy keeps begging for. We're all human (and young American parents) after all. But the important part is that we are making informed, conscious decisions that we feel, in a small way, will help make us, and our world, a better place.
p.s. We did not buy that little black taxidermied bear at the garage sale pictured above, although Alice would've been thrilled if it lived in her bedroom. And after reading this hilarious post, I wish I'd had $500 to fork over for it.

THRIFTY: Christmas Decorating on the Cheap (and one expensive one)

My two favorite holidays are Christmas and Halloween, and I love decorating for both equally. Especially over the past five years since we've had the girls in our lives, it's become increasingly fun and important to create a festive home for the holidays. As a young family, we are still adding to our arsenal of tchotkes, especially since someone has a lot of fun doing it and is a compulsive thrift shopper. (Ahhem.) Anyhow, I try to be selective about what we collect for the holidays, and I tend to focus on vintage and handmade items. And let me tell you, right now the thrift shops are ripe with goodies.


I just scored this handmade plush JOY sign from a new little local treasure of a thrift shop I just discovered. It was 50cents and is a a perfect, whimsical addition to my girls' room.


I got this pink and red tinsel tree at a yard sale for a couple of bucks in Minneapolis years ago. The vintage tree topper was a recent score for, again, 50 cents. The color combos match perfectly, and pink is one of my favorite colors ever. It sits atop our guest bathroom counter.

Since Lucy is in kindergarten this year, her craft and art making skills have not only improved but have become something she really enjoys. We find it important to showcase her work around the house. One cold, gray afternoon she and I made paper snowflakes adorned with lots of glitter, of course, which we both love. We strung them on yarn and hung them in the dining room window. She loves seeing them when we drive up from outside and the glitter shimmers in the sun when it's shining.

Instead of purchasing a door swag or wreath this year I made my own from tree trimmings, a recycled wire bow and some pine cones I found. It turned out cute and is way cheaper than spending $15-$25 on one at the grocery store.

Some of our holiday decorations have come in the form of gifts. My stepmom got me a set of these light up twigs after I was admiring hers. I found the large glass base at a thrift store and pulled the other twigs and rocks from my yard. The glitter leaves are from the dollar store and the cute beaded initial ornaments were this year's gift from my fabulously crafty sister-in-law Crystal. It's hard to tell from this photo, but it is a really cute and fun little display on our bookshelf in the living room.

But this has got to be the piece de resistance of my Christmas decorations: behold Elvis Presley's Graceland. All decked out for the holidays just like Elvis did it back in the day. I am a huge fan of The King, so much so that we spent our honeymoon in Memphis. And it just so happened that the year we got married and visited Graceland for the first time, in 2000, was also the year that Department 56 released this limited edition beauty. My new mother-in-law, a Department 56 junkie, found out and bought it for us as a wedding gift. And as you can see, it wasn't cheap. The house lights up, and with the pink Cadillac in the drive, you can almost feel that Elvis is in there shootin' up a TV while his Mama is in the kitchen fryin' up a peanut and banana sandwich for her boy. And sweet Priscilla is probably swiggin' on her secret bottle of brandy while applying her black cat eye makeup in the bathroom. The tree lights blink and the "Merry Christmas to All, Elvis" sign strung between two trees is an authentic little replica of the original.
So, I love me some Christmas decor and the cheaper and kitschier, the better. And if I ever become one of those people who install the flag post on the outside of their house, you can bet this will be added to my arsenal that year.

KIDDOS: Boise Fire Department Tour

Our playgroup had a killer schedule of fun, educational and inexpensive dates each week this fall. One of our favorites was a tour of Boise City Fire Station No. 8 on Overland Road on the Boise Bench, which happens to be the second busiest station in the city. Most local fire stations offer free tours to kids and groups as a public service and let me tell you, they did a super job.

Of course, the kids all got a turn sitting in the drivers seat of the firetruck, which was a huge thrill and a great photo op for the moms.

And they learned about all the gear the truck holds, including how the hoses work.
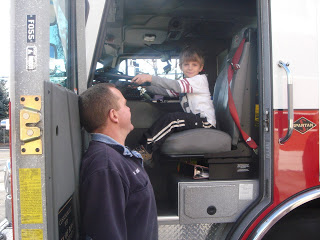
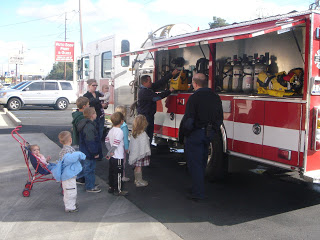
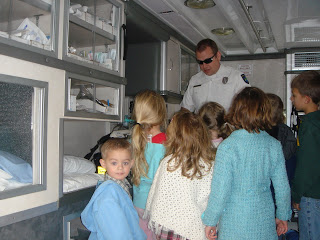
A surprise highlight was a tour inside an Ada County Paramedics ambulance. We learned that there is an ambulance at each Boise fire station and that they go out on all calls with the fire truck. The paramedic showed the kids how the equipment and the gurney works and explained it all in kid-friendly, non-scary language. What a unique experience to be inside an ambulance in a non-emergency situation first.

The firefighters also dressed up in their full fighting gear to show the kids what they may look like should they ever see one in the case of a fire. This was such a great thing for the kids, I thought, because the guys in gear can be scary and intimidating, especially if you encounter one through smoke and fire.

Of course, we all loved watching them slide from the upper level where they sleep down the fire pole to the garage.

Besides their bedrooms and bathrooms, the upper level also contains a full workout room, so they can stay all firm and fit for their duties (and for the 2010 Idaho Firefighters Calendar which you can purchase now at all Boise and Meridian fire stations - OF COURSE WE ASKED.)
In addition, we saw their kitchen and learned about their unusual shifts, the types of trucks they use for each fire and interesting little tidbits like the fact that firetrucks do not require keys to start. The guys were full of helpful information and gave the kids bookmarks, stickers and bracelets at the end of the tour promoting fire safety at home. We were there a little over an hour and I have to say, I enjoyed it as much as the kids, and not only because the firefighters were cute. It was an educational and important experience for us all.

FOODIE: Kitchen Hacks

So, I'll admit, I'm a bit crazed when it comes to reusing and recycling. I hate to waste anything, even in the kitchen. I try to find a reuse for all food containers and if I can't, I recycle even the smallest parts. What food I cannot salvage, we compost in our backyard container. I've found some pretty unique ways to use kitchen items and thought you might find these hacks helpful too:


1) Wash and save plastic butter tubs, large yogurt containers, coffee cans and the like. They are great for sending home leftovers with your dinner guests, decorating with wrapping paper for holiday cookie giving, or a homemade drumset for your toddler.


2) Keep old egg cartons to use as paint "palettes" for kids craft projects.


3) Wash and snip up leftover fresh herbs before they go bad. Put about a tablespoon into an ice cube tray and fill with a tiny bit of water. Freeze overnight. Pop out the cubes and store in a plastic baggie in the freezer. It's great for when you need a bit of parsley, basil or cilantro for a recipe!

5) Also a good use for ice cube trays: pour in the old coffee left on the pot that you didn't drink. They make yummy ice cubes for making your own iced coffees the next day.

6) Small cookie cutters are excellent for fun with Play-Doh as well as make perfect stencils for art projects.

7) Invest in a pair of kitchen shears. I use these things for everything, from opening packages to trimming fresh flower bouquets to cutting up pizza into bite-sized pieces for Alice.

8) Save the small clean brown paper sacks that fast food restaurants always give too many of. They are great for packing work or school lunches in later.

9) Another easy way to save fruits and vegetables that are getting too ripe or about to go bad is to dehydrate them. Slice up the apples you didn't get to eating or the abundance of tomatoes from your end of the season garden harvest. They make delicious dried snacks.


10) Use cloth napkins. I find sets at thrift stores or garage sales and keep a basket on my table of mis-matched ones for everyday use. They are also super easy to make out of scrap fabric and make great gifts. It's also way more eco-friendly than the paper ones.

These are just some of these hacks I've stolen from others (like this fantastic website of tips from parents, learned from friends or discovered myself. As always, I'm up for tricks or thrifty ideas to save money, time, and resources.

CULTURE: Rocking Out to Records

Not only am I a fan of vintage things and ways of life, I am seriously old school when it comes to technology. Some of my aversion comes from nostalgia and preference (like I will never read on a Kindle because I love the smell and feel of old library books in my hands) as well as cost prohibitive (um, seriously Amazon.com? My library card is FREE). Plus, I don't really like the compatibility issues and how quickly gadgets get upgraded or outdated; it's too complicated for me (my book doesn't have to be plugged in, fits in my pocket, and all I need to know is how to turn a page). And I like my music the same way. Enter the centerpiece of our living room: The Crosley Traveler Stack-o-matic Turntable:


I've had a record player as long as I can remember. My parents have a heavy old console one with a radio also embedded within the giant, lovely piece of furniture. I got a new "stereo system" of my own, my first, as a gift for my graduation from junior high school. It was from JCPenney and had a turntable, radio and tape deck. I replaced many a needle on that thing and rocked out to my NKOTB tapes and Beatles records for years and years. It finally broke for good about twelve years ago, when new record players weren't yet being made and getting my old one repaired in rural Oregon was impossible. I sadly parted with it. When we moved to Minneapolis I found the Crosley Stack-o-matic at Restoration Hardware in St. Paul and was so excited. It took us a while to save up for it, as it cost around $200, a lot for two grad students. I loved the look of it, with the tan vinyl covering, how it stacks and drops up to six records at a time, and the fact that it is portable and can be folded up and carried like a suitcase. Also, the two small speakers spout the old school gritty lo-fi sound that I love about playing vinyl.

And I was also thrilled to finally be able to play my beloved old friends again, like these classics. The Annie movie soundtrack is mine from childhood, which my mom gave me more recently. She also gave me a slew of our old Disney records, like Disco Mickey and these sweet little storybooks:


Lucy loves listening to stories this way and turning the pages with the chime. I loved them, too, and have fond memories of being read to via this shiny black vinyl disk. Over the years we've all amassed quite the collection of vinyl, including the girls, mostly from garage sales and flea markets for around 50cents a piece. Of course, my favorites are my collection of Elvis albums and I'm a huge fan of Ella Fitzgerald, Billie Holiday, Dinah Washington, and Nina Simone, lovely ladies of jazz and blues. But of course I would be remiss if I didn't have a Cyndi Lauper album or two and some ABBA represented in the collection. And a little bit of samba and some Christmas tunes. And forty or so 1950s Hawaiian albums that I got off of Ebay. And we do, in fact, tote that Crosley around, mostly to the backyard for BBQs and firepit nights in the summer months. Our guests always comment on how fun it is and love digging through the albums to pick the next one. We do too, because it is a lot more of a personal, physical, memorable and exciting musical experience than pushing the tiny shuffle button on my Ipod.

ARTSY: Unique Family Portraits

I've never been a fan of the traditional posed professional family portrait. I typically dread the conversation about matching clothing and the thought of getting my children to behave properly while posing unnaturally. However, the grandparents really want nice photos to frame, so I usually succumb to JCPenney Portrait Studio once every year or two. As a mother of two young girls, it's also become increasingly important to me to document their growth as children with some sort of portraiture. So, about four years ago, we decided upon these:

It was around Thanksgiving time and we were taking guests to Minneapolis' ultimate tourist attraction, The Mall of America, the world's largest shopping mall. After riding the roller coaster in Camp Snoopy, the old amusement park in the center of the mall, we came upon a caricature artist and had our portraits drawn. I love the way they are quirky and exaggerated, much like our real personalities.
Of course, we get new ones of the girls done more often, since they change so much. This one of Alice and Lucy was drawn by an artist at the Western Idaho State Fair just this past summer.

I think the portraits of Eric and I are hilarious. Eric thinks he looks like a Hobbit, sporting his winter beard and cute little ears. (He also swears he never stands like this., but you get him talking about politics and he does.) The artists typically charge around $20 for black and white drawings and I got the matching frames at IKEA in Minneapolis for less than $10 a piece. They are a fun and inexpensive take on the typical family portrait and a great way to support struggling artists.

FOODIE: 1st Annual Food Network Cookoff

I was not born a cook. I didn't have a lot of training and was as scared of the kitchen as I was of learning to sew on my stepmom's vintage Singer sewing machine. My husband, Eric, has pretty much taught me the basics over the past ten years, and he is the best chef I know. He has given me the tools to make me brave enough to attempt recipes and the help when I need it. We've been fans of the Food Network for years now, but really got addicted about a year and a half ago. I think I spent my entire five-month maternity leave nursing baby Alice on the couch while watching Sandra Lee creating Tablescapes and Ina Garten throw fabulous little lunch parties. (I also watched WAY too many E! True Hollywood Stories, but I'll save that for another post.) Not only did I sit and watch, however, I learned. And I cooked. And baked. And probably can blame that summer for the 15 (or so) pounds of baby weight I've still to lose. But my husband, Eric, loved having a wife who had yummy new dinners and desserts waiting each night. And I loved doing it. After my maternity leave was over I had to go back to work full-time, which didn't allow me much time for cooking. Although we still watched the Food Network religiously, and drooled. But I soon got laid off and picked up where my cooking frenzy left off. I got so excited, in fact, that this summer I decided to host my first ever Food Network Cookoff. I stole the idea from my sister-in-law and her friends, who have been hosting Food Network Cookoffs for several years now. First, I put out a call to my friends who love to cook and immediately got enthusiastic responses. Each of the four participating ladies picked their favorite Food Network chef to represent. I'm always up for a challenge, and love her idea of semi-homemade cooking, so I chose Sandra Lee.


I immediately hit the Boise Public Library and checked out every Sandra Lee cookbook they had on the shelves. Three of my brave friends chose Alton Brown, Paula Deen, and Guy Fieri. We all met early in August to go over the rules, which are simple. Each chef has to cook an appetizer, entree, and dessert using a recipe by their FN chef, with no substitutions, eliminations or creative changes allowed. Everything is to remain anonymous and top secret; you cannot tell anyone what your recipes are or have any help in making them. Each chef gets to invite five "judges" to dinner at my place to sample and vote on their favorite dishes. That means, enough food to feed 24 people needs to be hot and ready at my place by 6pm on the date we selected in October. Why plan this two months out, you ask? Well, friends, it turns out there was a lot of sampling to be done. I mean, I made so many recipes that just weren't "winners," if you know what I mean. And I was out to win. And so were my three competitors, mind you. We cooked our asses off for two months and when the night in October arrived, we truly brought our game.

These ladies rocked it. Here they are in my kitchen, finally relaxing and having a glass of wine after a long day slaving over the stove. I bought all the chefs vintage aprons to wear along with nametags. The guest judges supplied the beer and wine for the event.

And we all ate our hearts out. Seriously, by 9pm everyone was in a food coma. This is a shot of the entree table before we dug in. As you can see, all the dishes were labeled with letters for voting purposes and during the awards ceremony, we all stated the title of our dishes and handed out copies of the recipes to the guests. Here you also see two of the five Crockpots that took up residence in my kitchen that night. I'm surprised we didn't blow a breaker. The silver Crockpot holds the Entree Grand Prize winner, this lovely pork chop recipe by Alton Brown. At the far end of the table you can see my entrant, these spicy baby back ribs by Sandra Lee. And I seriously recommend both, and not only because they are so easy and made in my beloved Crockpot, but because they are delicious.

After many drinks in the garage-turned-bar, the guests were greeted by the chefs and given the rules. Soon after the eating commenced. And commenced. And commenced again. And by all accounts, everything was wonderful.

After taking our time savoring each bite, and going back for seconds and thirds, we all had to fill out this ballot, voting for our favorite dish in each category. Eric got the privilege of tallying them up and handing out gift baskets I made for the winners of each category. I filled the baskets with cookbooks and kitchen gadgets. So who won, you want to know? I already gave away the Best Entree winner and I'll tell you I (Sandra Lee) tied with my friend Kristyn (Paula Deen) for Best Appetizer, with a crab bisque and a shrimp dip too die for. Paula Deen took the cake (a turtle cheesecake, to be exact) for Best Dessert. Damn her and her buttery buttered butter.

At the end of the night, not much was left but empty reminders of a 5-star meal lovingly slaved over by four women who love food. And I'm not being pretentious by claiming it was a 5-star meal. Seriously, we were all out to impress and that we did. I haven't had a more eclectic, amazing meal in a long time. It was a fun way to try out new recipes I might not have had the time, nor the balls, to try before. I'm pretty proud of how far I've come in the kitchen and am excited by how much further I can go. And let me tell you, I just saw Julie & Julia and Julie Powell's amazing cooking project inspired me. I'm already prone to take on insane, year-long projects, so you never know. I hope this inspires you, too. If anything, I hope it helps you realize that food is fun and with a good recipe and a little practice, anyone can cook.

CRAFTY: Spooky Squash Ghosts

I've made these cute little ghosts for the past couple of years for our Halloween party and they are cute, easy, and cheap quick decorations. We picked up a couple of butternut squash from the pumpkin patch for 45cents each, and a few came from grandma's garden. First, you thoroughly spray paint them white in the backyard or other well ventilated area:

After they've dried, use a black Sharpie marker to draw or cut black felt to glue the eyes and mouths onto the squash to make ghosts:

The one on the far left is Alice's, so it's a bit more abstract. I think they are darling and they last longer than a carved pumpkin. Lucy and her little friend loved drawing scary faces and they make great party favors for guests to take home rather than a bag of cheap plastic and candy goodies. We love decorating for Halloween and the amount of stuff we have for this holiday rivals the amount we have for Christmas. We also made this little recycled craft my friend Shannon over at AnchorMommy.com came up with and they are so simple and fun for kids, too. Both of these crafts, the squash ghosts and the jar jack-o-lanterns, would be nifty activities to do AT your kids' Halloween party. And, as always, the best thing is that they are very inexpensive, easy, and eco-friendly!

ARTSY: Recycled Girly Skirts

Last fall I took a Sewing for Beginners course through the Boise Schools Community Education program with my sister in law. We loved it, and learned to make great things, like pillows and purses. Most importantly, however, we learned how to use, and feel comfortable with, our machines. This was especially important to me, as I own a 1932 Singer which has simple mechanisms, but initially scared the shit out of me. I mean, this is an ANTIQUE and it was my stepmom's, so I really didn't want to bust it. The class helped alleviate my fears and, in fact, I learned to use it and now feel like a somewhat more advanced amateur seamstress. I've made all sorts of items and gifts and plan on making plenty more for holiday gifts. I have a huge assortment of vintage fabric and rick rack but have been really keen on recycling old clothing into new, funky items.

So I whipped up these cuties as back to school skirts for my girls and two of their friends. I got the idea when I found two pairs of women's pajamas pants made from jersey cotton leftover from my clothing swap last spring. To make Alice's skirt, pictured above, I cut off the bottom portion of one pant leg, made some accordion folds in the top, stitched them to fit her waist, and sewed on a monogrammed wool patch made by Boise artist Grant Olsen. Grant is well-known locally for his eclectic style and being prolific in numerous media. Lately, Grant has taken up sewing and quilting, making "security blankets for adults" out of recycled fabrics. He recently had a show of these sweet miniature patches at the Flying M Coffeehouse downtown Boise and I purchased a few. Alice, as you can see, got an A and Lucy got this one:


She is just beginning to learn all the states in kindergarten, so this shape of Idaho was perfect for her. I also made a matching skirt for Lucy's girlfriend, Vivi, with a darling one of a whale in the ocean because she lives near the beach in southern California.

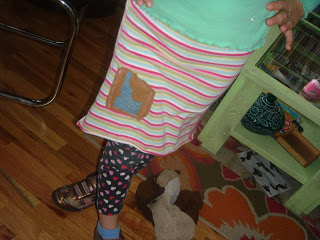
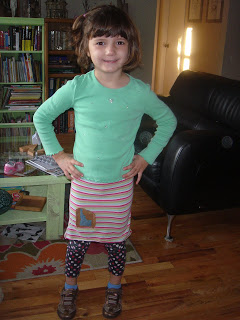
For these skirts I cut out the middle portion of the pant leg of another pair of women's PJs. They bunch up around the waist and you can fold them over to make them as long or short as you like. Therefore, the only stitching required on this one was the sewing on of the patch. Of course, these skirts are kind of one size fits all, and only if you are a girl under the age of six. These fun skirts were "sew" easy and fun and really cost next to nothing to make, and I loved the collaboration of two artists working with recycled materials!